Constructing Boy's Surface
Original-Version (Joe Fields)
Step-by-step instructions for making your very own Boy's surface (A strange and
beautiful embedding of a punctured projective plane).
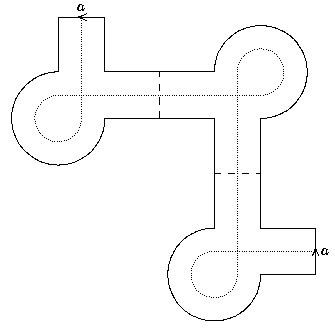
- First you will need a pattern
(as ps-file, or as
pdf-file).
Also,
scissors (although a matte knife or single-edged razor blade is better) and
some tape.
- Print the pattern three times. For best results, use as heavy stock as is
available for your printer.
- Cut out the patterns.
- Cut through the loop in one of your patterns and tape it back together
after linking it with another.
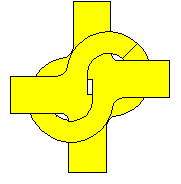
- Now bring the "points" of the teardrop shaped cutouts together.
- Curl-up one of the "legs" of one piece and position it so that is is held
by the teardrop-shaped hole in the other. Indeed, the pieces can be positioned
so that one leg of each piece is curled up inside the hole of the other:
- The last piece has to also have its loop cut, but it must be reattached
after linking with both other loops. The last link has to be
positioned in such a way that it will trap both of the free legs of the
previously assembled pair. (Symmetrically, it's legs get curled up into the
other pieces' holes.)
- A few more bits of tape placed strategically will give you a fairly sturdy Boy's surface
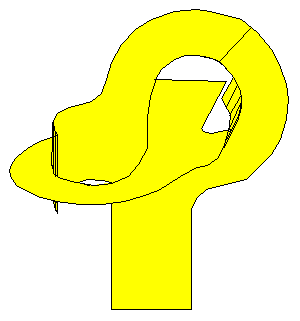
Aber man beachte, dass man auf diese Weise nur das "Innenleben" der
Boy'schen Fläche bekommen hat - man sieht die genaue Lage der
Doppelpunkte und des Dreifachpunkts, muss sich allerdings den Rest
der Fläche hinzudenken.
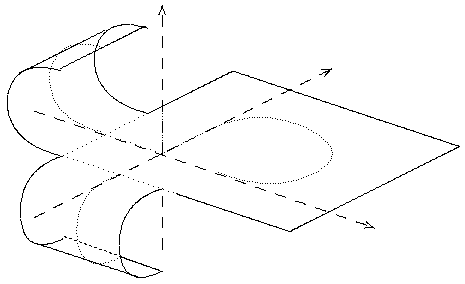
Die folgende Skizze verdeutlicht die Lage im R3.
Man sieht die drei großen Flächenstücke
(die hier jetzt
quadratisch gezeichnet sind - oben waren sie kreisförmig).
Die punktierte Linie ist wieder die Durchdringungslinie.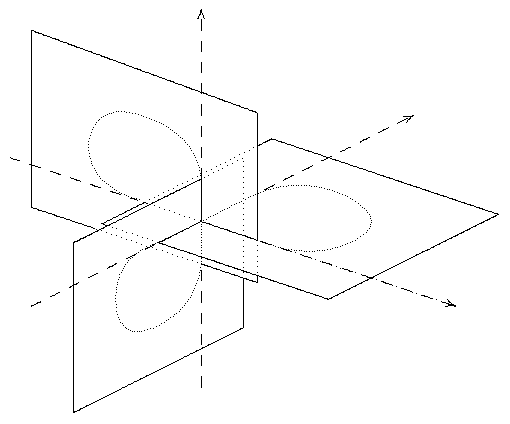
Hier noch ein einzelnes FLächenstück zusammen mit den zugehörigen
Anschluss-Streifen: